
How to open a bank accountكيفية فتح حساب مصرفي
Two layers: the chart account first, then one record per bank account. For why it is done this way, see Banks.
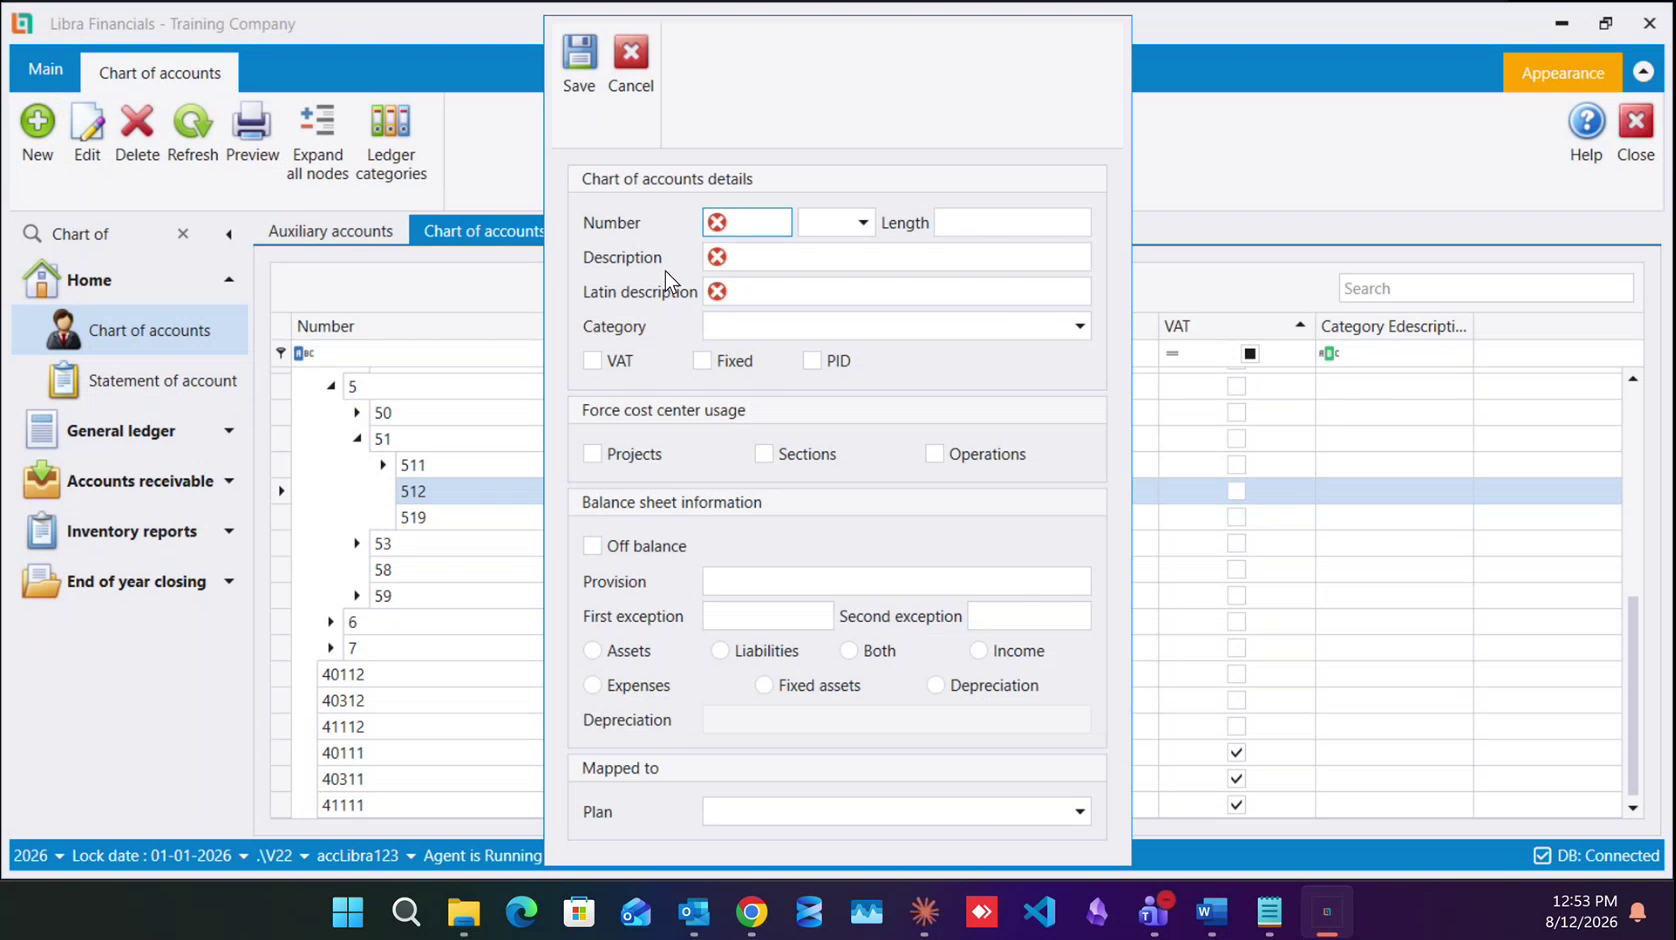
Step 1 - Decide whether to split 512. In the Chart of accounts, select 512 Banks (under 5 Current Assets → 51 Financial Institutions) and click New for each sub-account you want, for example a local bank, a foreign bank and an e-wallet. Tick PID on each: PID is what lets an account carry auxiliary records, and every bank account you open will be one. The field list is in How to create an account.
Skip this step entirely if one bank account is all the business has 512 can carry the records itself.
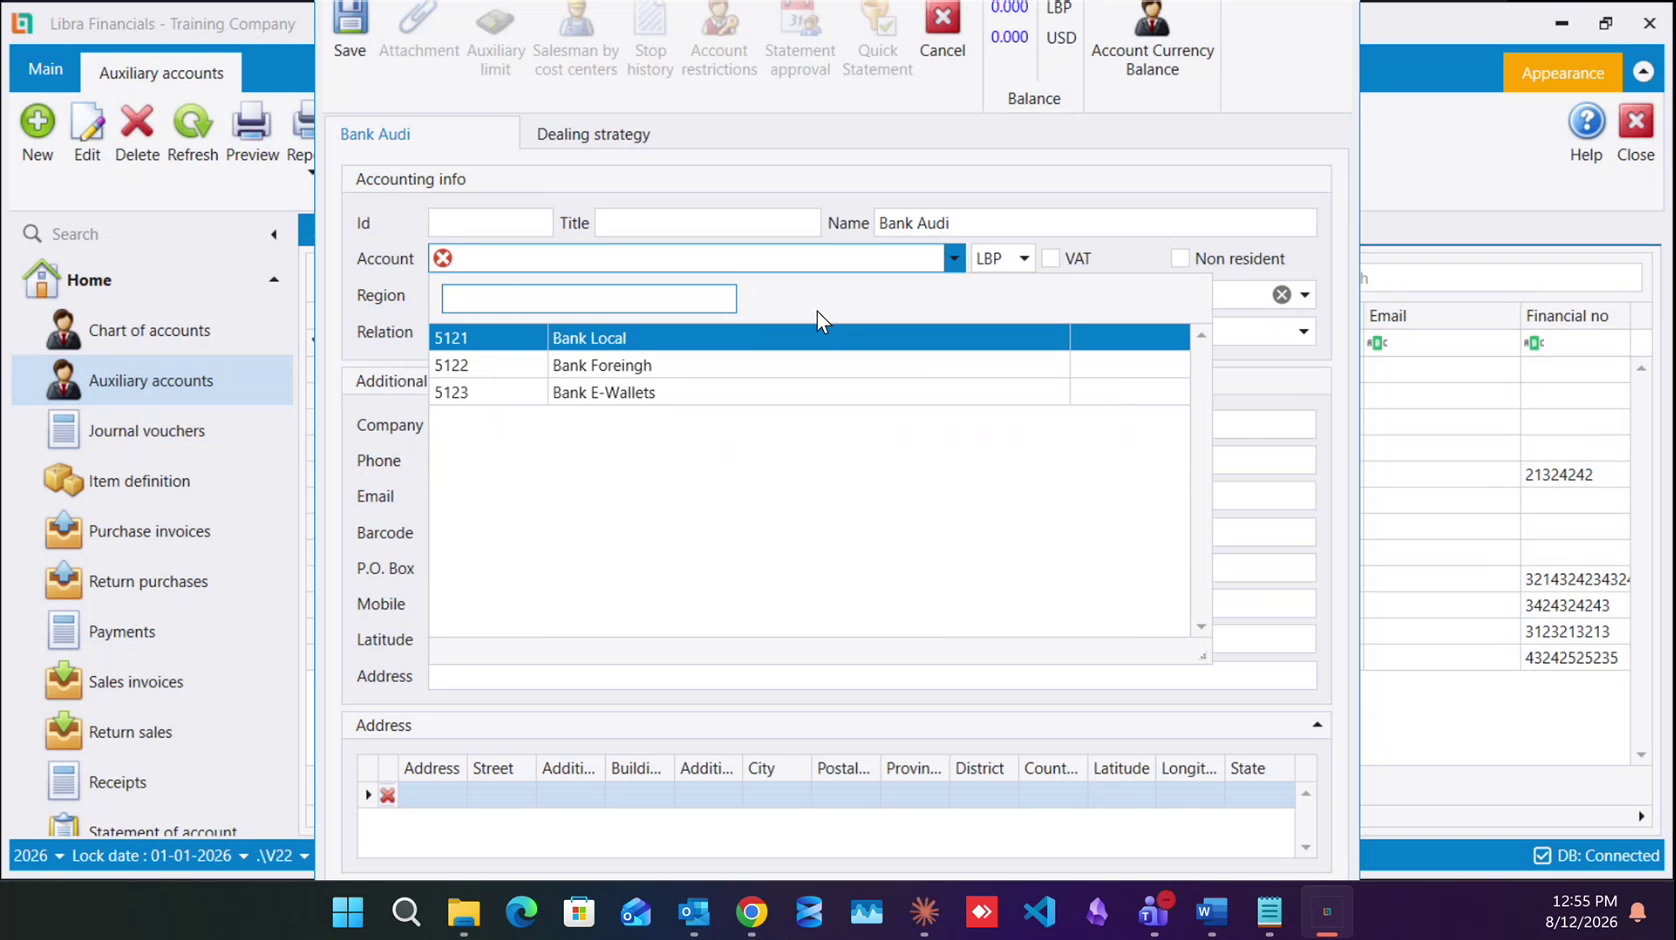
Step 2 - Open the bank account. Go to Auxiliary accounts → New. Set List to the bank list first; that filters the Account dropdown down to the bank accounts only. Pick the one this account belongs to.
Step 3 - Name it so you can tell it apart. One bank often holds several accounts for you, so put the currency and the real account number the bank gave you into the name:
Bank Audi - LBP - 123456
Set the currency dropdown beside the account, then fill in whatever contact detail you want. Every field is explained in The Auxiliary Accounts screen.
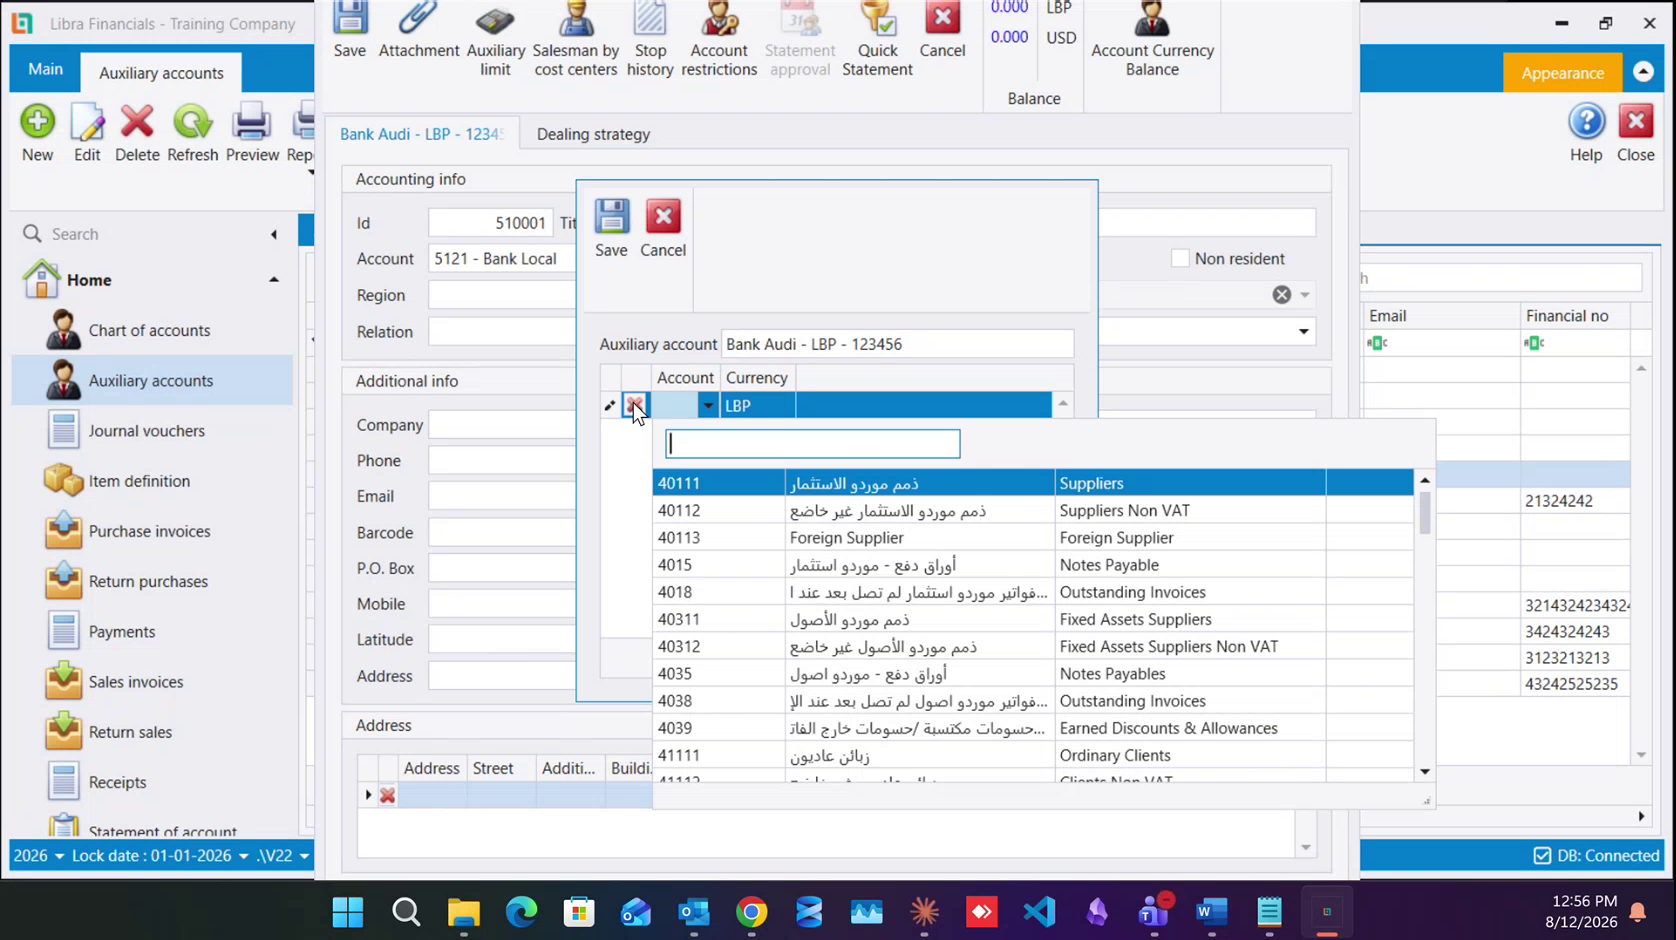
Step 4 - Lock the currency. Save the record, then click Account restrictions in the toolbar. Add a row: the Account (5121 Bank Local) and the Currency (LBP). Save the dialog. From now on Libra will not let a dollar post through this record. Repeat on the USD record with USD.
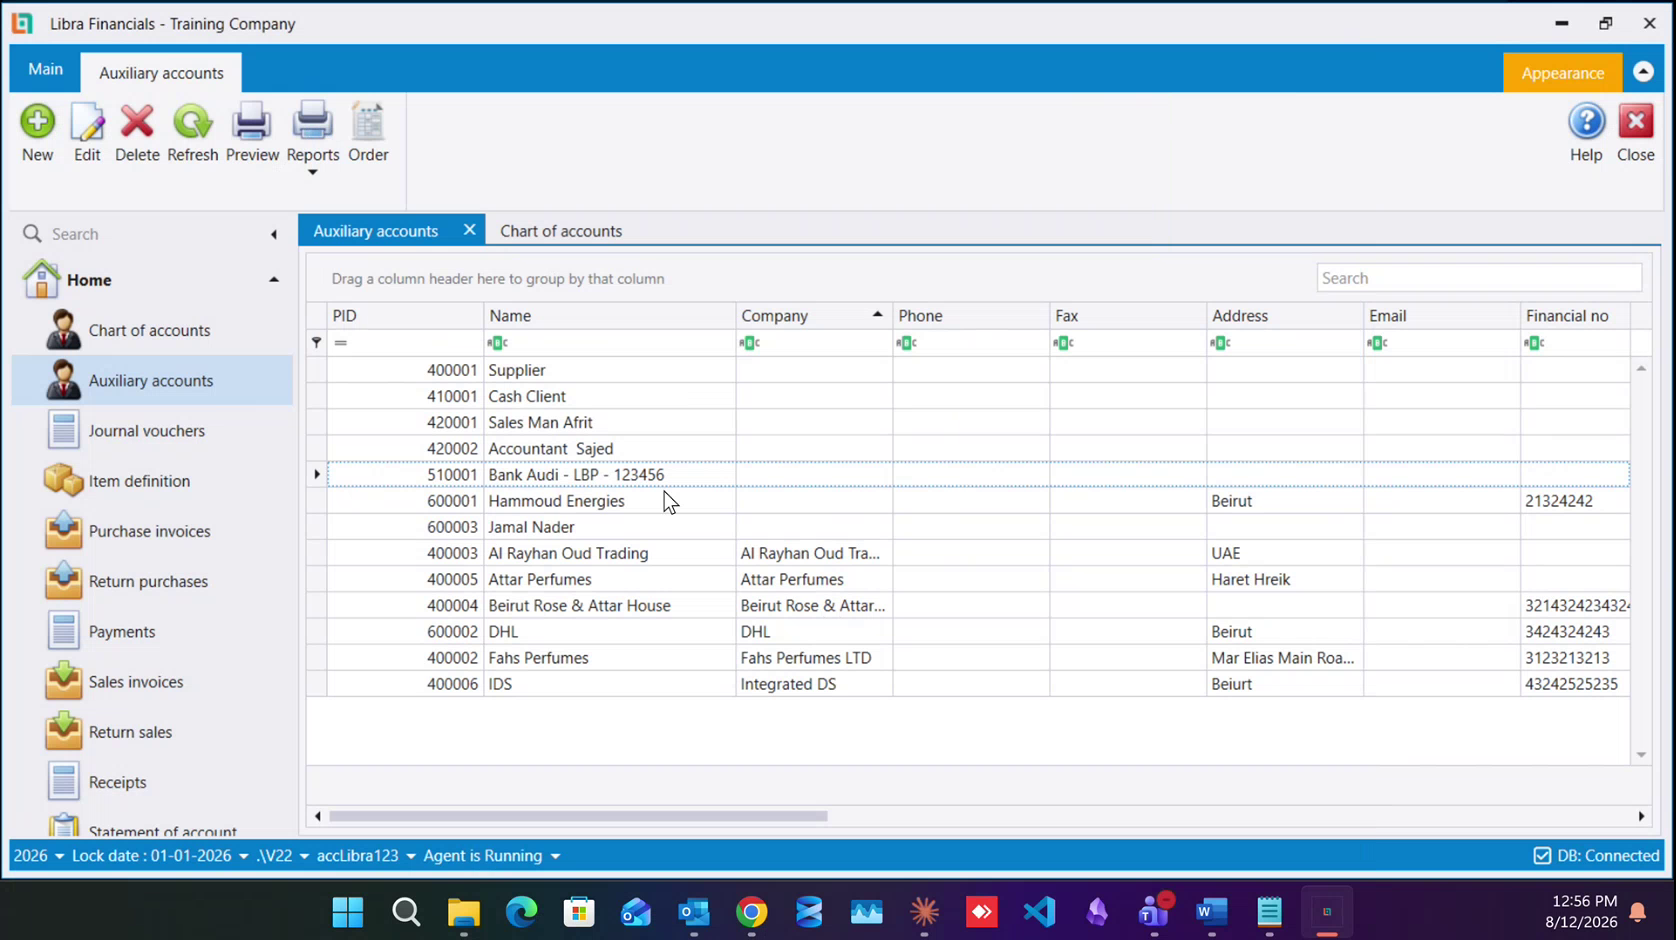
Step 5 - Check it landed. The record appears in the Auxiliary accounts list with the Id Libra assigned it; bank records run from 510001 upward.
Repeat steps 2–5 for every account at every bank LBP and USD at minimum. That is what makes reconciliation and transfers between your own accounts work.
طبقتان: حساب الشجرة أولًا، ثم سجل لكل حساب مصرفي. ولمعرفة سبب هذه الطريقة راجع المصارف.
الخطوة 1 - قرّر أتقسم 512 أم لا. في شجرة الحسابات (Chart of accounts) حدّد 512 Banks (تحت 5 Current Assets ← 51 Financial Institutions) واضغط جديد (New) لكل حساب فرعي تريده - مثلًا مصرف محلي ومصرف أجنبي ومحفظة إلكترونية. وضع علامة PID على كل منها: فـ PID هو ما يتيح للحساب حمل سجلات مساعدة، وكل حساب مصرفي تفتحه سيكون واحدًا منها. وقائمة الحقول في كيفية إنشاء حساب.
وتجاوز هذه الخطوة كلها إن لم يكن للعمل إلا حساب مصرفي واحد - فـ 512 يحمل السجلات بنفسه.
الخطوة 2 - افتح الحساب المصرفي. اذهب إلى الحسابات المساعدة (Auxiliary accounts) ← جديد (New). اضبط القائمة (List) على قائمة المصارف أولًا؛ فهذا يُصفّي قائمة الحساب (Account) لتقتصر على حسابات المصارف. ثم اختر الحساب الذي ينتمي إليه هذا الحساب المصرفي.
الخطوة 3 - سمِّه بما يميّزه. فالمصرف الواحد يحمل لك عدة حسابات غالبًا، فضع في الاسم العملة ورقم الحساب الحقيقي الذي أعطاك إياه المصرف:
Bank Audi - LBP - 123456
واضبط قائمة العملة بجانب الحساب، ثم املأ ما شئت من بيانات الاتصال. وكل حقل مشروح في شاشة الحسابات المساعدة.
الخطوة 4 - اقفل العملة. احفظ السجل، ثم اضغط قيود الحساب (Account restrictions) في الشريط. أضف صفًا: الحساب (Account) أي 5121 Bank Local، والعملة (Currency) أي LBP. واحفظ النافذة. فلن يسمح ليبرا من الآن بترحيل دولار عبر هذا السجل. وكرّرها في السجل الدولاري مع USD.
الخطوة 5 - تحقّق أنه استقر. يظهر السجل في جدول الحسابات المساعدة بـالمعرّف (Id) الذي وضعه ليبرا؛ وسجلات المصارف تبدأ من 510001 صعودًا.
وكرّر الخطوات 2–5 لكل حساب في كل مصرف - بالليرة وبالدولار كحد أدنى. فهذا ما يجعل التسوية والتحويل بين حساباتك ممكنَين.