
Reading in Englishالقراءة بالعربية
How to create a clientكيفية إنشاء زبون
Clients are created on the Auxiliary Accounts screen, exactly like suppliers. This is the short version; the Auxiliary Accounts screen explains every field.
- Open Auxiliary accounts from the left menu and click New. The editor opens blank, with Name, Account and List flagged in red, those three are required. Leave Id alone; Libra fills it in when you save.
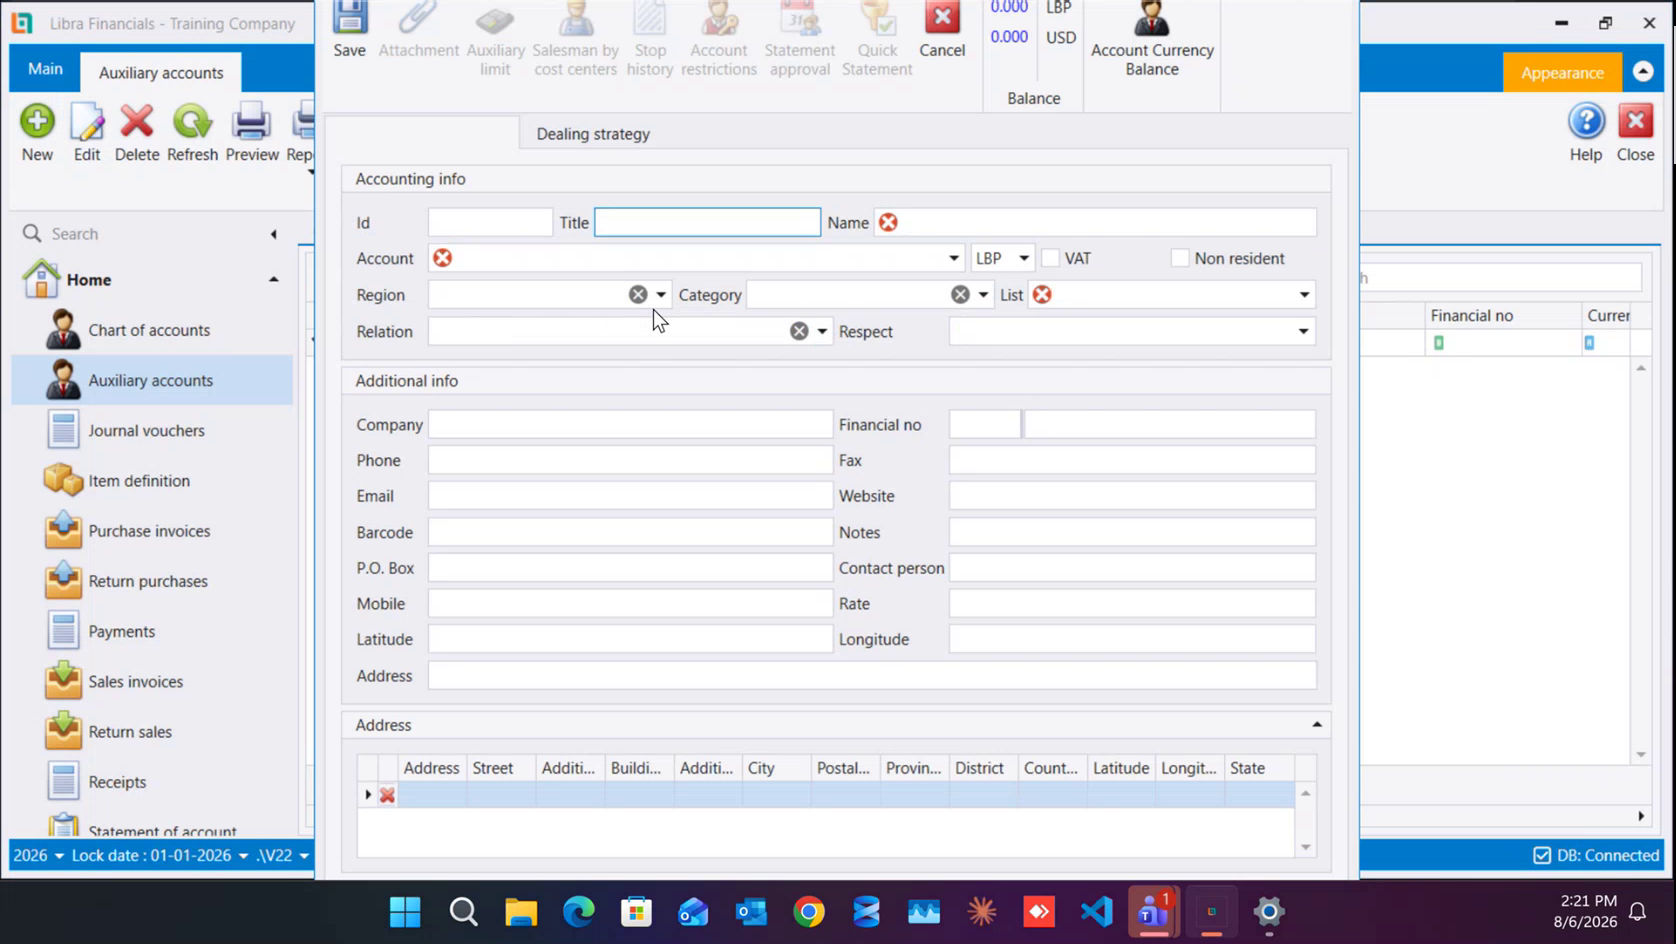
- Type the Name you will search by, then set List to
Clients, do this before touching Account, because it is what filters the account list down to client accounts. - Open Account and pick one. With
Clientschosen it offers only41111 Ordinary Clients,41112 Clients Non VAT,4115 Doubtful Clients,413 Notes Receivable (Clients),415 Unearned Revenueand418 Outstanding Invoices. Everyday customers go on41111or41112, and that choice is what sets the VAT box for you.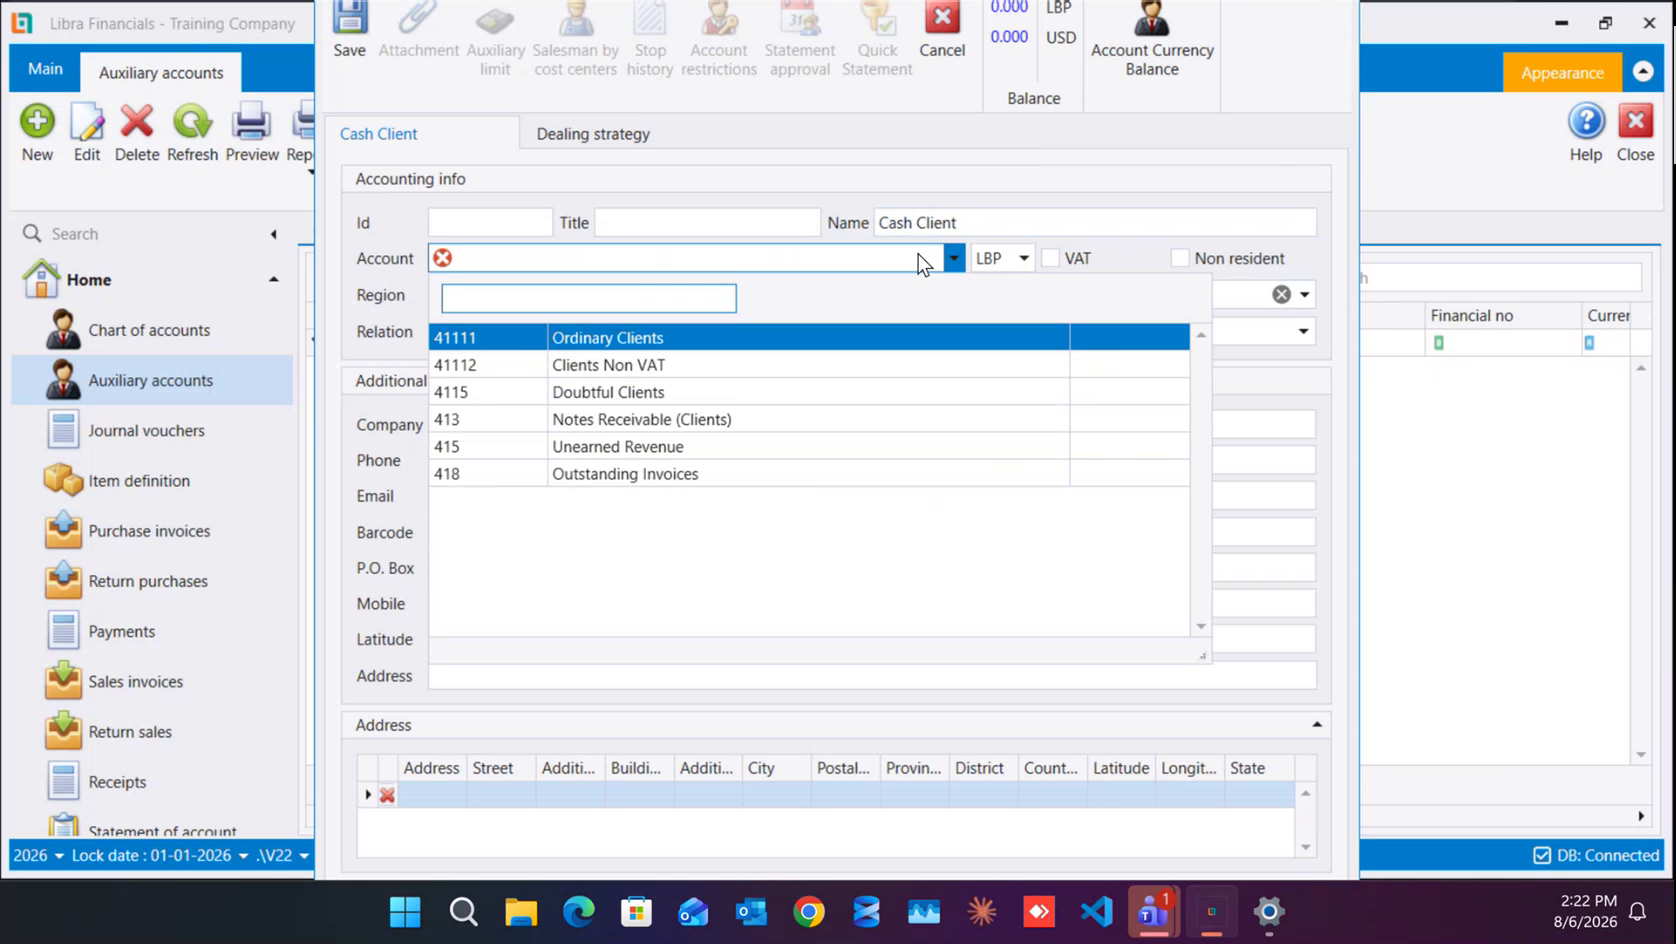
- Fill the rest:
- Currency: follows the account;
LBPorUSD. - Company: the official registered name. It is what the top-10 reports print, so do not leave it blank.
- Financial no: the prefix (
601/604/605) in the small box, the number itself in the large box. No number at all → tick Non resident. - Rate: an exchange rate just for this client, if you have agreed one.
- Currency: follows the account;
- Click Save. Libra assigns the Id (client records run from
410001upward) List greys out for good, and the toolbar buttons come to life. The client is now available on sales invoices.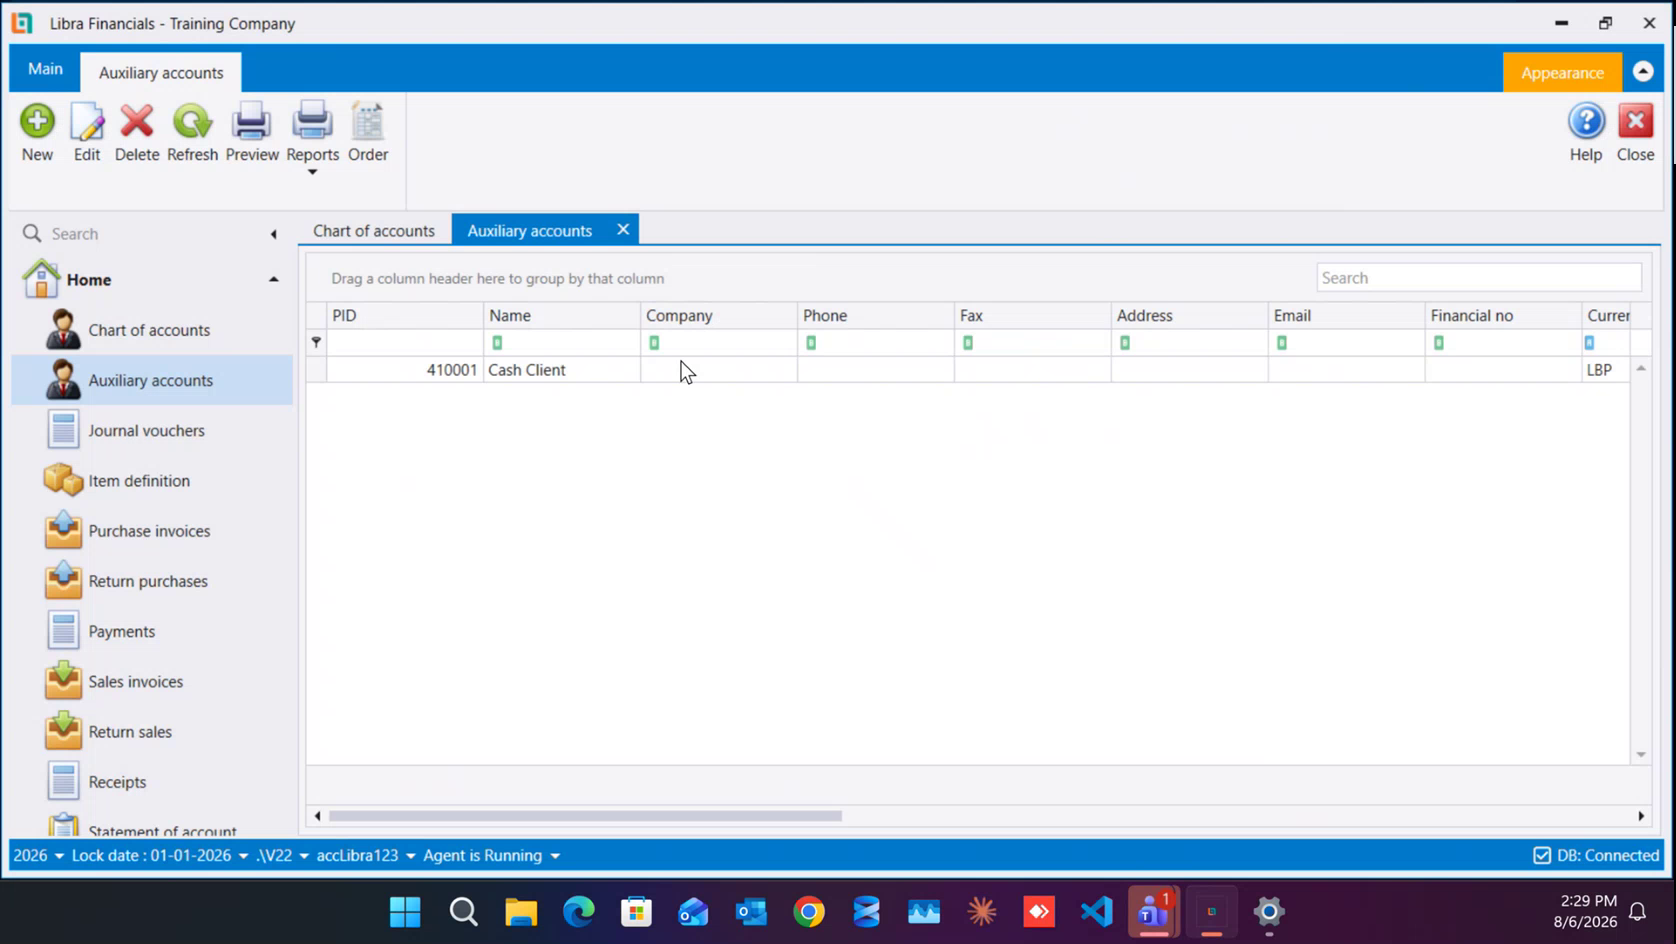
For walk-in retail, do not open a record per person. Open two generic cash clients instead: Cash Client - WITH VAT on 41111 and Cash Client - No VAT on 41112. See Clients.
يُنشأ الزبائن في شاشة الحسابات المساعدة (Auxiliary accounts) تمامًا مثل الموردين. وهذه النسخة المختصرة؛ أما شاشة الحسابات المساعدة فتشرح كل حقل.
- افتح الحسابات المساعدة (Auxiliary accounts) من القائمة اليسرى واضغط جديد (New). يُفتح المحرّر فارغًا وعليه الاسم (Name) والحساب (Account) والقائمة (List) معلَّمة بالأحمر، وهي الثلاثة الإلزامية. واترك المعرّف (Id)؛ يملؤه ليبرا عند الحفظ.
- اكتب الاسم (Name) الذي ستبحث به، ثم اضبط القائمة (List) على
الزبائن (Clients)- وافعل ذلك قبل أن تلمس الحساب (Account)، لأنها هي التي تُصفّي قائمة الحسابات إلى حسابات الزبائن. - افتح الحساب (Account) واختر منه. فمع اختيار
Clientsلا يعرض إلا41111 Ordinary Clientsو41112 Clients Non VATو4115 Doubtful Clientsو413 Notes Receivable (Clients)و415 Unearned Revenueو418 Outstanding Invoices. ويذهب الزبائن اليوميون إلى41111أو41112- وهذا الاختيار هو ما يضبط لك مربع الضريبة (VAT). - املأ الباقي:
- العملة (Currency): تتبع الحساب،
LBPأوUSD. - الشركة (Company): الاسم الرسمي المسجَّل. وهو ما تطبعه تقارير العشرة الأوائل، فلا تتركه فارغًا.
- الرقم المالي (Financial no): البادئة (
601/604/605) في الخانة الصغيرة، والرقم نفسه في الخانة الكبيرة. ومن لا رقم له إطلاقًا ← ضع علامة غير مقيم (Non resident). - السعر (Rate): سعر صرف خاص بهذا الزبون إن كنت قد اتفقت على واحد.
- العملة (Currency): تتبع الحساب،
- اضغط حفظ (Save). يضع ليبرا المعرّف - وسجلات الزبائن تبدأ من
410001- وتصير List معطّلة نهائيًا، وتعمل أزرار الشريط. وصار الزبون متاحًا في فواتير البيع.
وللبيع المفرَّق لا تفتح سجلًا لكل شخص، بل افتح زبونَي نقد عامّين: زبون نقد - مع الضريبة على 41111 وزبون نقد - بدون ضريبة على 41112. راجع الزبائن.